Feeds:
Posts
Comments

So I realize I haven’t posted in over a month but…oh well. School comes first and now I am GRADUATED!!!!
So Happy and So EXCITED for the summer.
I’ve decided that the BBA Challenge is taking up a lot of my energy so I think that for the next while my blog will focus on just BBA and Daring Kitchen Challenges. I don’t have time to post daily on everything I cook. Maybe by the time that the challenge is over I will have more skills and ideas to get some interesting recipes up here.
For now though I am enjoying focusing on breads.

Even though I haven’t posted, I have been baking so I’m going to spend the next couple of days updating the blog with all the BBA stuff I have done. I did a lot in a short time and now I will be caught up to the rest of the crew (or at least those following the original schedule). I also have a full time job for the summer which means I will have less time than I thought to to bake. But some days with more time will give me the chance to catch up.

This post is on the Brioche, #4 on the list. I was quite nervous about this one because apparently the butter made the dough hard to handle. In the BBA book there are three versions with varying amounts of butter. Mostly for health reasons, I chose to do the Poor Man’s Brioche, which has not only the least butter but also is the simplest.

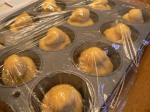
Overall the recipe was not too difficult (from what I remember!) and boy did they taste good. I should note that I made 16 brioche, in the evening (they were ready at about 8 or 9) and when I woke up the next morning there were 2 left. Seriously! I was kind of shocked and looked around thinking they had been put away but no. That was all that was left.
That’s why I love my family, they love Everything I make barring disaster!

The June Daring Bakers’ challenge was hosted by Jasmine of Confessions of a Cardamom Addict and Annemarie of Ambrosia and Nectar. They chose a Traditional (UK) Bakewell Tart… er… pudding that was inspired by a rich baking history dating back to the 1800’s in England.

Time for another DB Challenge (#2 for me)
I don’t have a lot of time to make this post and I think it will be going up a day late ( have to double check the rules). In fact. as I ame wrigtigng this it is late at night and I am falling asleep, writing this with my eyes closed!
But tomorrow I am baking ciabatta in the mroning and will not have time to write a decent post. I will just be uploading photos and throwing it on there.

So I was pretty excited about this challenge because I had been considering doing a bakewelll tart from one of Jamie Oliver’s cookbooks bor a while. I’ve never made jam before and with school ending I knew that this probably wasn’t the time totry. Later in the summer I am plannign on making strawberry jam. Once the weather he ats up and the strawberries have more falvour. Instead, I decided to buy a nice expensive jam for this tart as it is a big focus in the whole thing. In the end I got Greave’s Rhubarb Raspberry Jam, delicious!

The recipe was not hard to put together, especially since I had made frangipan for several previous recipes. I wasn’t sure if the frangipan should be refrigerated after it was prepared so I didn’t do so, and I think that was a mistake because my final product was nice and tight on the outside, but very oozy on the inside.
Luckily, as I said before, my family isn’t too picky on the issue and the pie was almost gone in a matter of 10 minutes. I tried some and loved it! I hope I get another chance to try it with my own jam!

Sorry again for the short post, but I am just waiting for my poolish (for ciabatta) to ferment and then it’s sleeptime!
woops, changed my mind! I am posting this now but will update it tomorrow with pictures!

The May Daring Bakers’ challenge was hosted by Linda of make life sweeter! and Courtney of Coco Cooks. They chose Apple Strudel from the recipe book Kaffeehaus: Exquisite Desserts from the Classic Cafés of Vienna, Budapest and Prague by Rick Rodgers.

So this is my first Daring Bakers Challenge and I was so excited for it. The best part was that it was something completely new and really challenging. Strudel sounds hard, but it is really fun to make. The recipe involved stretching a dough to paper thinness, before adding the filling and rolling it up. Even though mine never got to the recommended size of 2×3 feet (something my dad thought was a crazy size!) it still turned out pretty incredible if I do say so myself.

I did a sort of test batch for my mom’s birthday. It was filled with cherries and chocolate and it turned out okay. My biggest mistake was putting too much filling so I only got two layers. It still tasted great though.

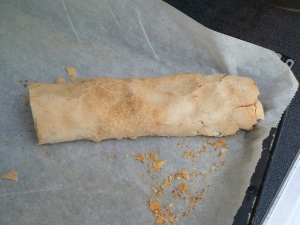
My successful batch, or what I count as my successful batch, surprised me with how good it tasted! Someone at work requested that I make them an apple strudel (not knowing about the Challenge, believe it or not). I wanted to do something a little more creative so I ended up making a mango apple strudel.

It was amazing. Seriously.

The sweetness of the mango went perfectly with the texture the apples provided. I ground up some walnuts to use as a little base and I had added a sugar/cardamom mixture to the mango and apple filling to give it a touch more sweetness. What was great was that it wasn’t too moist and the apples let the whole filling hold its shape a bit more. It wasn’t mush.

The flavour was sweet and delicious, I had no complaints and neither did anybody else! It was gone by the time I came home from work a few hours later.

This strudel was a huge accomplishment for me and now it’s a dessert that I would love to make again and again. I’m so happy I did this challenge and I can’t wait until the next one!

P1090912

Happy Baking:)

PS. What happened unfortunately with the pictures was I didn’t have the camera when it came out of the oven. Then I asked my parents to photograph it while I was at work. Today I realized that they just took this one photo. Now I know. hehe.

Yay Bagels!
I am quite a fan of bagels and was really excited to try them with the BBAC. I have never made them before so I pretty much went in blind. Now it should be noted…my dad is not the biggest fan of bagels.

Peter Reinhart does a great intro to these bagels as he describes his love for the perfect New York Bagel. Unfortunately for me, I suppose, I have not had the good luck to have a bagel in New York. So I think that I did not have too high a standard. This turned out to be a good thing.

P1090694

I usually find bagels too dense and hard for me. I am not a fan of the double calories found in bagels either. Now I don’t count calories, but I do acknowledge they exist, we have a love hate relationship, calories and me. So I was interested to see how these bagels would turn out for me.

P1090697

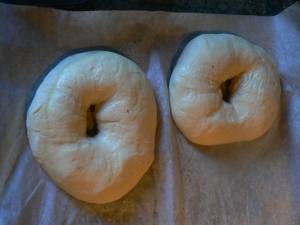
I decided to make them as a precursor to my mom’s birthday (it was on Victoria day, do you have Victoria Day in the US?). I made them for Sunday, the day before. I again rediscovered my love for kneading and making bread. It is just so satisfying and obviously a ridiculously good work out! The process went pretty smoothly. My only error was that I overproofed the dough before putting it into the fridge to retard overnight. There is a float test involved, and instead of coming to the surface in 10 seconds, mine floated right away. I knew that there was something not totally right as they looked a bit tooo puffy. I had a feeling they would flatten out. Oh Well!

 P1090700

The next morning I got ready to boil and bake. I topped my bagels with poppy seeds. During the boiling it again became evident that they had overproofed when they floated immediately once more. They definitely didn’t puff up and look like commercial bagels. However, at this point I had not seen the more successful results of other BBA’ers and I was perfectly satisfied with what I saw.

P1090699

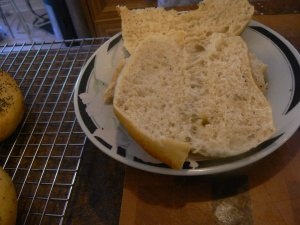
The final product was definitely a bit flatter than a regular bagel and had more air bubbles, much less dense than usual. Yet, this turned out perfect for us! We don’t really like super dense bagels anyways and these were soft and perfect. All’s Well that End’s Well!

Happy Baking!
-Natasha

P1090715First of all I would just like to say Happy Birthday mom! I love you soo much!

Ok. Back to business. So last week, I was just searching around foodbuzz and other blogs and somehow came to find a reference to the Foodie Fights. Iron Chef for food bloggers. Hmm…Me being as curious about blogging as I am, I decided to check it out. It is really cool, they pick about 5 bloggers and two ingredients every week and the bloggers have to create something and post it. Then it is voted on and a winner is declared. I signed upright away.

And I was chosen!

I was so excited. Not just to be chosen but that my ingredient was chosen. You see when you sign up you get to choose one ingredient you would like to have for the challenge. It may or may not get chosen. Mine did, I am the raspberry!

So Cauliflower and Raspberries are our ingredients. I don’t know if you’ve noticed but I’ve never seen too many recipes with this combination. At first I had no idea what I was going to do. NO IDEA. Then all of a sudden I had several! I was thinking of doing a soup, a cold cauliflower soup and a cold raspberry soup and combine them. But then I figured that wasn’t too fair since I wasn’t actually combining the ingredients in one dish. I also thought of doing mashed cauliflower and raspberries, like mashed potatoes. Wasn’t cool enough for me.

Then I knew what I would do. A souffle. At least I would try to. This recipe is based on one I found on epicurious which gave me a souffle base to add my own spin too. Since I’m not a strong enough cook yet to make a souffle without any guidance.


This souffle is not difficult to make and it turned out quite well. I added a little too much salt but otherwise it was quite good. Now I warn you, this is a truly eclectic dish and it isn’t for everyone. For example. My dad wasn’t a fan but my mom and grandma loved it! What was even better was that it suited the parameters of my grandmother’s special diet. Bonus!

I was really happy with how the souffle came out in the end, since it was made in the middle of a crazy day. It being my mom’s birthday everyone was prepping for tonight’s dinner. But I made it and I was happy with it.

P1090714

Please don’t forget to vote for me on Tuesday and Wednesday and check out the results on Foodie Fights on Thursday. I am so excited about this entry!

Please Vote!
Who is the winnerof Battle Cauli-Razz?(online poll)
Here’s the recipe:)

Raspberry Cauliflower Souffle

5 tbsp cauliflower

1/4 cup crushed frozen raspberries

1/2 tsp cardamom

6 tbsp milk, at room temp

1 1/2 egg yolks, at room temp

2 egg whites

1/4 tsp salt

2-3 tbsp butter

2 1/2 tbsp flour

  1. Preheat the oven to 400F. Butter about 6 small ramekins (butter some extra or a few less depending on the size. Mine were Really small so I got about 8 ramekins from this recipe)
  2. Combine the cauliflower and raspberries in a medium bowl.
  3. Melt the butter in a small saucepan. Slowly add flour, whisking constantly to combine (it’s a roux! I love fancy cooking terms). Bring it to boil and give it about a minute to thicken, still whisking. Slowly add the milk, whisking constantly. Remove from heat and add yolks one at a time, incorporating completely each time.
  4. Combine butter and cauliflower/raspberry mixture. Set aside to cool.
  5. Beat the egg whites at high speed to stiff peaks. Check the stiffness every 2-3 minutes, do not overbeat them. They are stiff when as you raise the whisk, the peak does not fall.
  6. Add 1/3 of the whites to the cauliflower mixture and fold into it, to lighten. Add in the rest of the whites. Spoon into the prepared ramekins to about 3/4 full. Wipe the edges of the ramekins clean.
  7. Bake for about 25-30 minutes.
  8. Enjoy!

P1090663Soo, BBA Challenge #2. I’m getting a bit of a head start because I do have exams coming up and well, probably won’t be cooking much then. So unfortunately I can’t do a long post right now, I am trying to catch up on some work (got to stop slacking!!!)  but I wanted to get this up.
P1090654

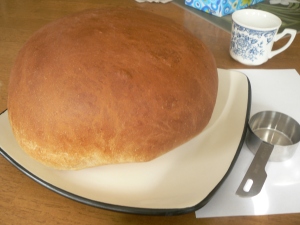
So this bread caused me many problems. I called it the bread of Murphy’s Law. Everything that can go wrong, will go wrong. I took out the poolish (pre-ferment) to get to room temp, but didn’t prep the ingredients. Then, I prepped the ingredients but forgot to take the poolish out when they were ready (I had put it back in while I prepped). Then I made a beautiful dough and realized I forgot to add the eggs! I was so frustrated. I was so upset. And then my grandma saved the day. Calmed me down and added the eggs into the dough bit by bit. 

Bread came out huge and beautiful and golden. It may have risen a bit too much as I might have put a bit too much yeast into the poolish, but it worked out ok. In fact, the spices in the bread give out this amazing aroma that my parents loved. It is a great bread and we are just finishing it up now.

As a group, we are not giving out the recipes as we are encouraging everyone to buy the book and I really recommend it! The breads in there are great and afterwards I know that I will be able to try out even more things and add flavourings and new dimensions to the breads. I am loving the magic of the yeast which grows and adds so much to the bread. I love the BBA Challenge!

I apologize that the pictures aren’t too great, I didn’t have the chance to set up and make better ones.

So, don’t know if anyone’s noticed but we’re in a recession. Also, food is expensive. Also, I live with my parents so they pay for my wonderful obsession. So I do my best to help out. Whenever I can I buy my own groceries, especially butter. I usually purchase my own butter for baking, it goes fast! My family’s really good about it and they rarely never complain. Still, lately I’ve tried to make things up using stuff we already in the house. I’ve literally gone through all of our nuts with my baking over the past week! Soon we will have to go buy more but there is still some usable material.

This brings me to the chicken. Every day my grandma tells me what meat is defrosted, I work with it. Looking around my fridge, I knew that I wanted to try something original and something that would taste good, and something I’d never done before. I want to learn new things and the best way to learn is to…practice! So in my fridge, the first thing I noticed was the pomegranate juice left over from the pomegranate martinis my parents made for mother’s day dinner.

One of the things I’ve learned over the past little while is the magic of the marinade. Common sense I know, but still. I’m new! So I made a quick marinade (there wasn’t too much time!) and added some red wine and honey to give it some dimension, hopefully. It only got to marinade for about 45 minutes and I know this affected the flavour. I gave it a bit of seasoning before putting in the oven and I don’t know if this made a difference but I think that marinading it overnight or at least 3-4 hours would make it even better. Everyone really enjoyed it, but I know it needs a little work. So if you try this, make sure you follow the general marinade rule of a few hours, I just wish I’d thought of it sooner!

Overall this is a fun recipe, and the chicken gets a nice colour from the purpleness of pomegranate juice and red wine. I do recommend this recipe and feel free to offer any suggestions, like maybe how to make a nice glaze for it?

P1090690

Pomegranate Chicken

3 boneless, skinless chicken breast

1 cup pomegranate juice

1/4 cup red wine (full bodied)

1/4 cup honey

2 cloves garlic

1 tbsp each of basil and sage

salt and pepper

  1. Combine pomegranate juice, red wine, and honey and pour into a large ziploc (or any plastic bag) with the chicken, seal and marinate  for 3-4 hours.
  2. When ready to cook, preheat the oven to 350 (check note at bottom), drizzle a pan with olive oil (not a sheet pan, deeper) and put it in the oven as it preheats.
  3. When ready to prepare, season the chicken with salt and pepper, and the herbs. Remove the pan from the oven and put the garlic in, stir around. Put the chicken in and place in the oven for 30-45 minutes.
  4. Enjoy!

*Note: Since this was my first time making it, I put it at 350 and waited about half an hour. It was still a little pink inside and I was in a bit of a rush so I put it up to 375. I think it would be fine to keep it at 375 the whole time and the cooking time would be shorter. Feel free to adjust as you need!

So…Mother’s day. I know it just passed but this is the first chance I’ve had to post! Back to the day. My mom to me is the most amazing person I know. She is the rock in my family and I don’t know what we would do without her. Honestly, she keeps the peace between everyone. I knew that for Mother’s day I wanted to do something special, because she needs a break.

With so many recipes on the internet and in my cookbooks, you can imagine what a hard time I had choosing one! I am as always a huge overachiever so I wanted to make a million things, unfortunately most things I wanted to make required the oven and the poor oven can’t make more than one item at a time. Oh the choices. So I looked around my kitchen and what do I find but my heart shaped cookie cutter. MUST use it. I also know that my mom doesn’t want anything tooooooo sweet.

So. I decided on French Toast eggs in a basket, or as I call them, “Eggs in a French Basket” *hehe*. These were so fun to make! I had to make some part of it sweet so while I didn’t put any sugar in the soak for the large toast, when I dipped the cut out hearts I added maple syrup and cinnamon to the eggs and milk. YUM!

I couldn’t just leave it with that. So I cut up some mango slices from these wonderful mangos we had just bought and I melted some dark chocolate in a double boiler. I mixed the dark chocolate with some homemade granola that I had made the week before. It was like a little mango parfait with chocolate granola.

Finally, I made my mom her favourite cappuccino. Luckily our espresso machine had been fixed by then (it was torture when it was gone). I also have a little french press style foamer that I use for the cappucino and it’s my mom’s favourite part.

She was so happy when my dad and I came to her with breakfast in bed. The meal was great and my dad and I brought our plates up too so we had a little family gathering in the morning on their bed. It was really sweet, peaceful, and restful. It was the perfect start to the day.

P1090606

Eggs in a French Basket

6 slices bread, artisan bread is best! (day old)

10 eggs

1/2 cup milk

1 tbsp maple syrup

1 tsp cinnamon

  1. Preheat the oven to 350F, line a deep dish pan with a piece of parchment, use two pans if all slices won’t fit on one
  2. Using a cookie cutter (I used a heart) cut out the centre of each slice of bread and don’t throw out the centres.
  3. Whisk together 4 eggs and 1/2 cup milk (you may need to add eggs and milk, depending on how much the bread absorbs). Dip each slice of bread into the egg/milk mixture and place into the pans (not the centres). Crack an egg into the centre of each piece of bread. Put in the oven for 25-30 minutes or until golden brown and the eggs are set.
  4. Heat a non-stick pan to medium heat. To the rest of the egg/milk mixture, add the maple syrup and cinnamon. Dip the centres into this mixture and fry on the pan until golden brown on both sides.
  5. Serve together with fruit or any side!
  6. Enjoy!

So I am very excited to take part in the BBA Challenge hosted by Pinch My Salt. The idea is that we are going to bake every bread from Peter Reinhart’s Bread Baker’s Apprentice. One bread a week. I’m so excited! It’s going to be rough sometimes as I am still in school but I hope I can keep up. The deadline is May 10th (tomorrow) to join so hop on over to Pinch My Salt to sign up. There’s over 100 bakers already of all different experience levels. What’s great about it is how helpful everyone is… I love being in a community like that because you always have that support.

P1090581

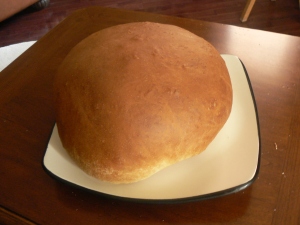
The first bread on the list is Anadama, a traditional New England bread. Though apparently it’s not complicated, I have never done a sponge before so it was very new for me (I’m always so paranoid about these things, I stayed close to it all times and willed it to bubble I swear!). But everything ended up working out great. The bread is interesting because it has a cornmeal base with molasses as a sweetener so it produced a very unique taste.

P1090583

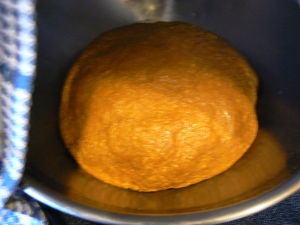
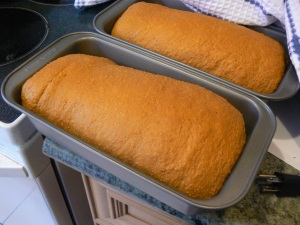
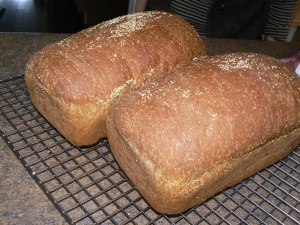
It basically consisted of soaking the cornmeal overnight, making a sponge, making the dough and letting it rise, then shaping it, putting it into pans and letting it rise again. What came out was pretty much an amazing sandwich bread. It had a thin but crunch crust thanks to the cornmeal and the inside was so soft and fluffy. Since I don’t bake bread a lot (at all!) I was fascinated by how delicate and soft the risen dough was.

P1090590

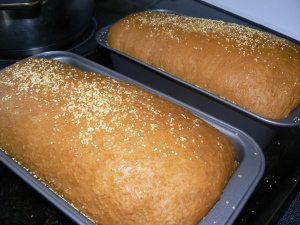
My family loved the bread, it made two loaves so we gave one to my aunt. The bread was slightly sweet due to the molasses and was excellent toasted with butter. Everyone said it was so different from what they had before (white bread, whole wheat bread, grandma’s amaazing whole wheat bread!). I would love to make it again if I didn’t have a year of different breads ahead. After though!

P1090604

Next is Artos, Greek Celebration Bread.

So the other cookie that I made for my sister’s coworkers were Apricot Oatmeal Cookies. I thought it would be fun to use some of the dried fruit we had other than raisins (which most of my family doesn’t like anyways). One of the things that has happened since I started cooking so much is that I’m suddenly a huge klutz. I swear I have dropped almost everything in the kitchen at least once. I’ll drop the spatual 5 times while cooking one meal and I have to wash it between each drop!

My family isn’t even surprised anymore when they hear a huge crash while I’m cooking. Today I dropped a cup of tea which luckily didn’t break. Seriously. I don’t understand what’s happened!

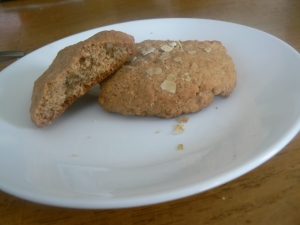
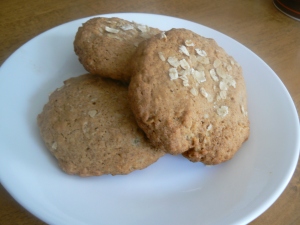
Anyways. These cookies were my second attempt at making my own recipe. I looked at a bunch of cookie recipes again to get basic proportions down. These ones were very different from the chocolate chip cookies, there was baking powder so they rose and were more cakey than chewy. I also wanted to make them whole wheat but not too tough so I sifted the whole wheat flour. This pretty much meant there was no oat bran and I think it turned out almost like whole wheat pastry flour. However there was a really good crumb and the cinnamon really came through. Overall I considered them a success (though I could have added eve more apricots. Next time I’ll try and make a flatter more chewy cookie.

p1090554

One interesting thing with these cookies is that I’m testing out different, more natural sweeteners. Here I tried out agave nectar while cutting down the white sugar (not cutting it out completely). I think it turned out pretty well and if you don’t have agave nectar, honey works as well. More oats could be added as well!

Yesterday was a success:D

p1090551

Whole Wheat Apricot Oatmeal Cookies


3 cups whole wheat flour, sifted

2 tsp baking powder

1/2 tsp baking soda

1/2 tsp salt

1 tsp ground cinnamon

1 cup oats

1/2 cup (1 stick) butter, softened

1/8 cup vegetable oil

1 cup brown sugar

1/4 cup white sugar

1 tbsp agave nectar or honey

1 tsp vanilla extract

2 tbsp milk

1 egg

1 egg white

1 cup dried apricots, diced

  1. Preheat oven to 350F and line a baking sheet with parchment paper
  2. In a medium bowl, combine sifted whole wheat flour, baking powder, baking soda, salt, cinnamon, and oats. Set aside.
  3. In a large bowl, cream together butter, vegetable oil, brown sugar, white sugar, and agave nectar. Whisk in vanilla, eggs, and milk incorporating each addition completely before adding the next one.
  4. Mix flour mixture into butter mixture. In the middle of mixing add in apricots and finish combining.
  5. Roll dough into balls about 1 inch in diameter and press down into a disc.
  6. Bake for 20-25 minutes or until golden brown on the edges.